
 With 32 years of experience, Paul Peebles, a sales executive with Sashco, is well-known and regarded as one of the foremost experts in the log home industry on building and maintaining log cabin homes. A log homeowner himself, Paul has worked with hundreds of log homeowners over the years and has gained a wealth of knowledge on how to make the correct choices in the design, building, and finishing of log homes. Here, Paul shares his top three best practices for building a log home.
“So, you want to build a log home? I highly recommend it with all my heart. Living in a log home—or having one as a second home—is a lifestyle change. It is a feeling that is hard to convey, but it seems that time slows down a bit in a log home. Your muscles lose their tension, food tastes better, the flowers are more colorful, and the bird song is a little sweeter. To help you make decisions about your new log home, I have come up with a Best Practices list for you.”
BEST PRACTICE #1
DESIGNING YOUR LOG HOME
Design to your short-term and long-term needs.
The design of your home is the most important aspect of the project. The design must fit your lot size and shape, and your budget. It should also accommodate a few things you may need in the future – like more bedrooms for grandchildren, or at least one bedroom on the main floor to avoid steps as you grow older.
Design less maintenance into your home.
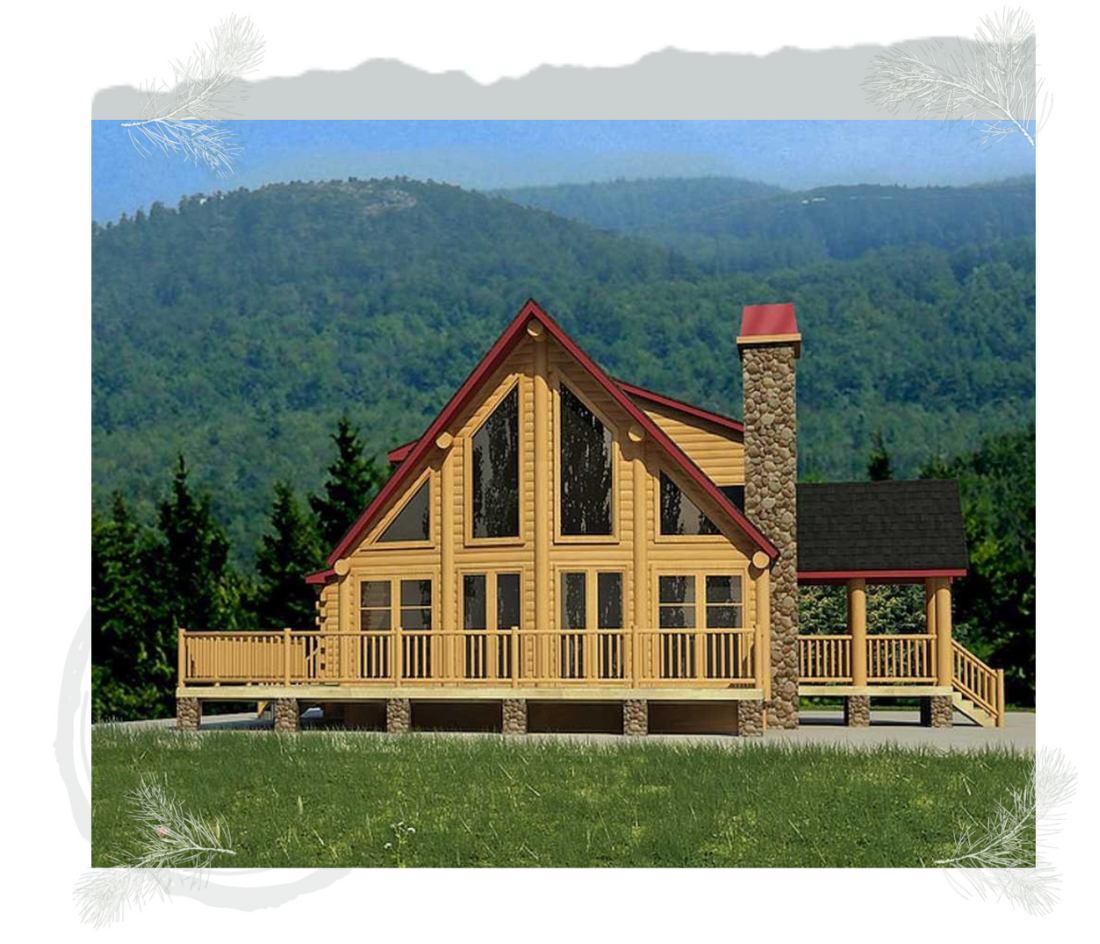
The more you protect the logs from the elements, the less maintenance you will have to perform. For instance, if you designed a six-foot porch all the way around your home, you would have a very low-maintenance structure that would simply need to have the dust cleaned off periodically. You would also have a great deal of wonderful outdoor space to enjoy. If your design has one covered porch, then try to orient the home to face the Southwest – which is where the sun shines most. This will greatly reduce maintenance on that part of your home. If you can’t add porches, I would recommend adding wide eaves or roof overhangs to partly protect the logs by shading the home for at least part of the day. I always recommend 2’ eaves on a single story and wider on a two-story. Adding 6-inch gutters with protective screens will channel water away and keep your logs drier and shaded. Also, build the house three feet off the ground to mitigate damage during flooding.

BEST PRACTICE #2
BUILDING YOUR LOG HOME
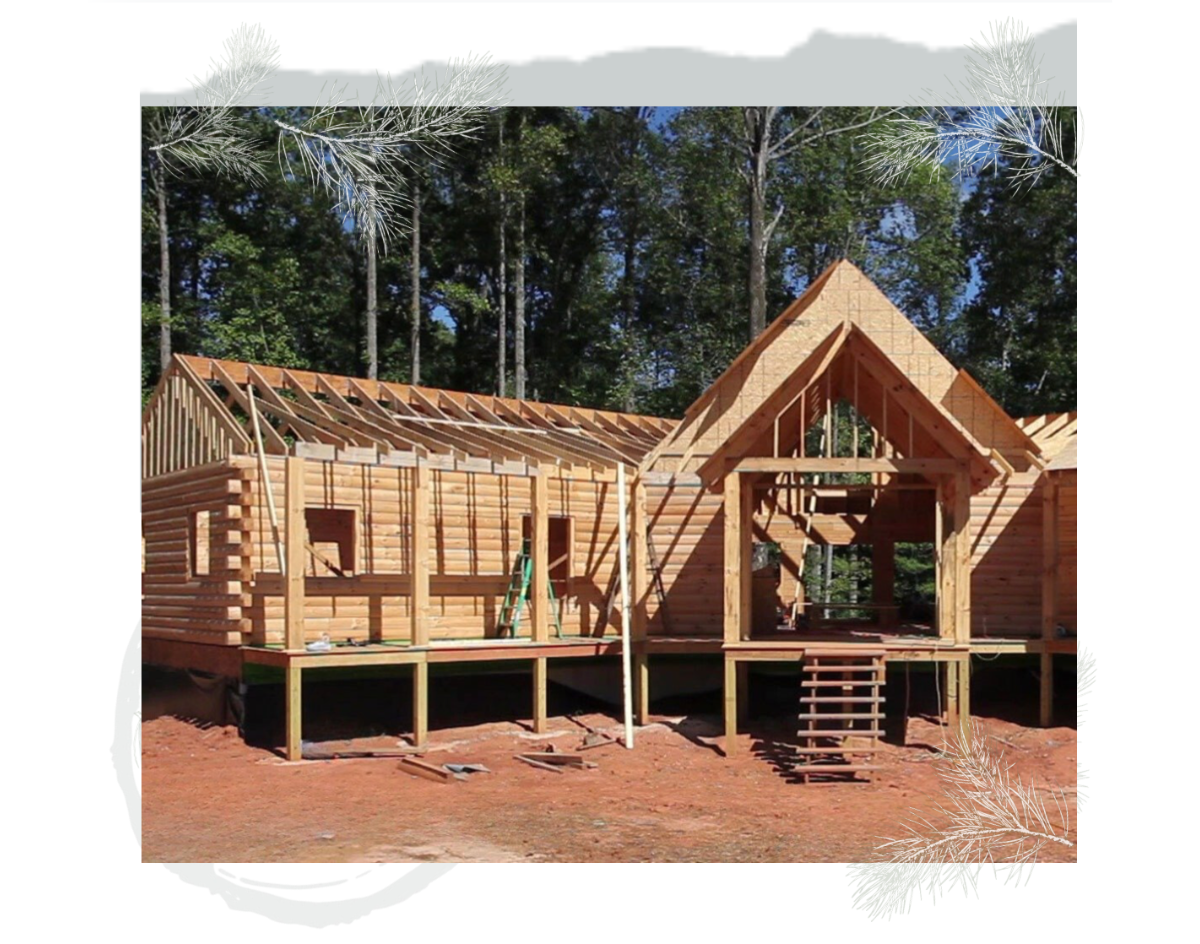
Prepare your site before the logs arrive, and keep your jobsite clean.
One of the best ways to make the construction process go smoothly is to be as detail-oriented as possible before the logs are delivered. Make sure your driveway is passable in all kinds of weather. Your foundation must be complete, and square. Remember that clean jobsites are evidence of well-run jobs. If the site will be muddy, have gravel delivered, and supply some walk boards to keep mud to a minimum during construction. The last thing you want is muddy tracks on your logs – a sign of a disorganized job in progress!
Set up an area for waste like wood scraps, as well as a trash receptacle for garbage produced by workers, and wrapping removed from building materials. Logs should be securely covered each evening – especially if inclement weather is expected. High winds play havoc with tarps if they are not secured.
Visit the jobsite often – but don’t get in the way.
During the erection of the logs, the beams, and finally the roof system, I suggest that you not be an absentee owner. Visit as often as you can – but don’t get in the way. If you see something that you do not like or understand, then speak up. Good log home companies along with good contractors know how to handle problems and keep the job going. Rely on them. Listen to their ideas, make your wishes known, and most difficulties will be overcome in a timely manner. Working this way will help you resolve issues and keep moving to the next phase of your project.
BEST PRACTICE #3
STAINING AND FINISHING YOUR LOG HOME
Budget upfront for staining, and rely on experts to get the job done right.
The roof is on, the interior is finished, electrical and plumbing rough-in are complete – you are almost there. Now you are ready for staining. The price for this can range widely depending on the size of your home, but I typically tell people to plan for anywhere between $2,000 and $4,000. There are lots of choices and opinions out there, but I can make this statement with the utmost confidence – use products that say “log homes” on the label because logs are different than other exterior siding products commonly used in conventional homes.
Along that same line – you wouldn’t take your car to be repaired at a lawnmower dealership – don’t let a regular house painter apply the specialized stains and sealants to your log home. Please use someone who has experience with log homes. If you don’t know where to find someone, our company, Sashco, can direct you to a professional in your area here.
Choose the right color and type of stain.
Some people think that darker stains are sturdier than lighter tones, but this is a misnomer. It is true that gray tones last longer than yellow or red tones. But any of these tones work well and last, so choose the color you like the most. What you really want in a log finish is something not only flexible but elastic. Your logs heat up throughout the day as the sun comes out, so you need a stain that “stretches” with the log in that heat. As it flexes, the stain maintains a waterproof shell on the log. Also, be aware that water-based stains are generally better than oil-based stains. The opposite of this used to be true, but through mandates to reduce Volatile Organic Compounds (VOCs), water-based stains have emerged as less expensive and better overall.
Plan to apply a clear maintenance coat three years after you build.
The most important part of a new log home’s life is when it receives the first application of stain after you build, and what happens three years later. After about three years, natural cracks will start to appear in the logs, allowing opportunities for water to get behind the stain. So, in that third year, I recommend that you wash the house and then apply a coat of clear stain – it’s not hard to do. Start by caulking what you need to first, and then apply this waterproof clearcoat into every tiny crack. It goes on milky and turns clear. This will protect your home from tiny leaks that can turn into big problems later.
eLoghomes highly recommends Sashco, one of the nation’s top companies that provides stains and finishes for log homes.